Margins play a very important function in a record’s formatting. It permits you to select the distance between the content material and the perimeters of the web page, thereby letting you keep an eye on the record’s format whilst making sure clarity. By means of default, Google Doctors provides an inch of margin on every facet of a record. Then again, you may now and again wish to exchange the margins in keeping with explicit necessities. The excellent news is that you’ll be able to customise margins in Google Doctors simply.
This information will display you how one can upload, edit, and customise margins in Google Doctors.
Why You Would possibly Wish to Alternate Margins in Google Doctors
Converting margins in Google Doctors will also be useful for more than a few causes. You could have sure necessities for the record you might be running on. As an example, when running on a shopper proposal, you have got gained a collection of pointers or formatting necessities that you simply should adhere to.
You may also wish to exchange margins for more than a few causes, comparable to aesthetic personal tastes, printing concerns, and many others. Imagine placing a desk of contents to your Google Doctors report for simple navigation.
Now, allow us to duvet how you’ll be able to exchange margins in Google Doctors.
The best way to Edit and Customise Margins in Google Doctors
1. The use of Web page Setup
You’ll customise margins in Google Doctors the use of the Web page Setup choice. Take a look on the detailed instructional underneath.
- Open your most popular browser and move to Google Doctors.
- Get started with a brand new record or open an present one.
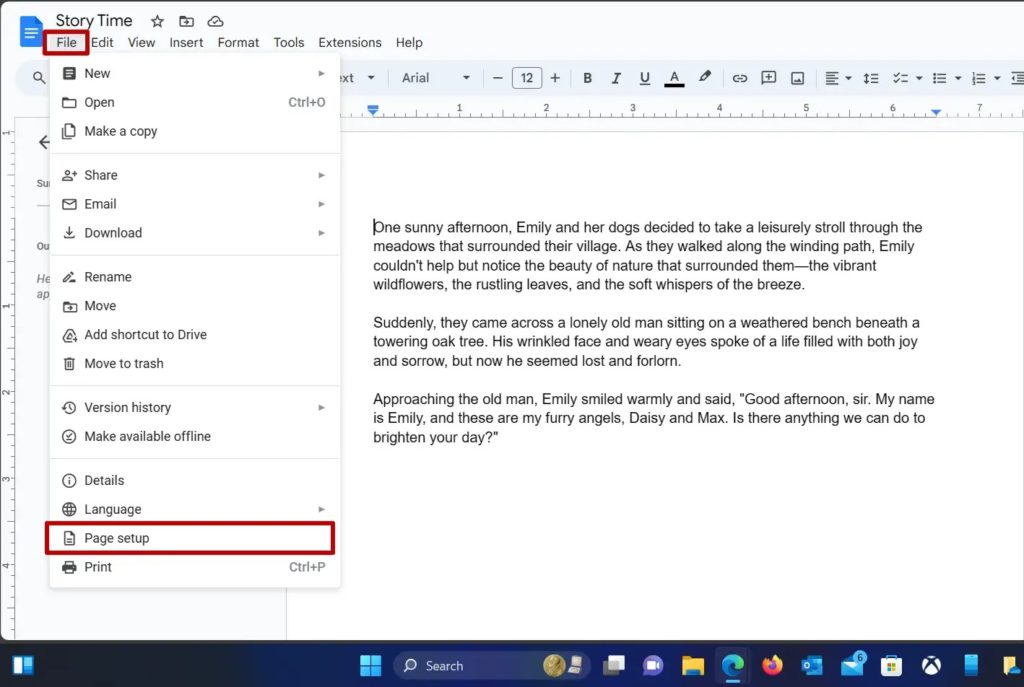
- Navigate to Record within the toolbar menu at the most sensible left nook and click on on Web page Setup.

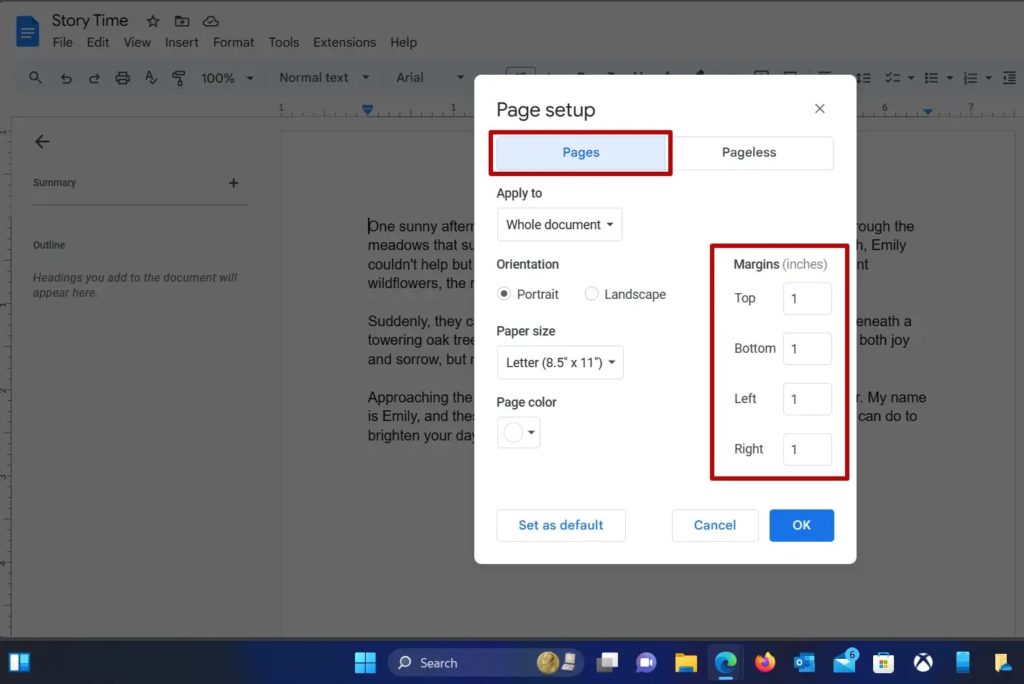
- A brand new window will seem with the Web page Setup menu. Ensure that Pages is chosen on the most sensible. Now, you’ll be able to modify the margins on both sides of the record.

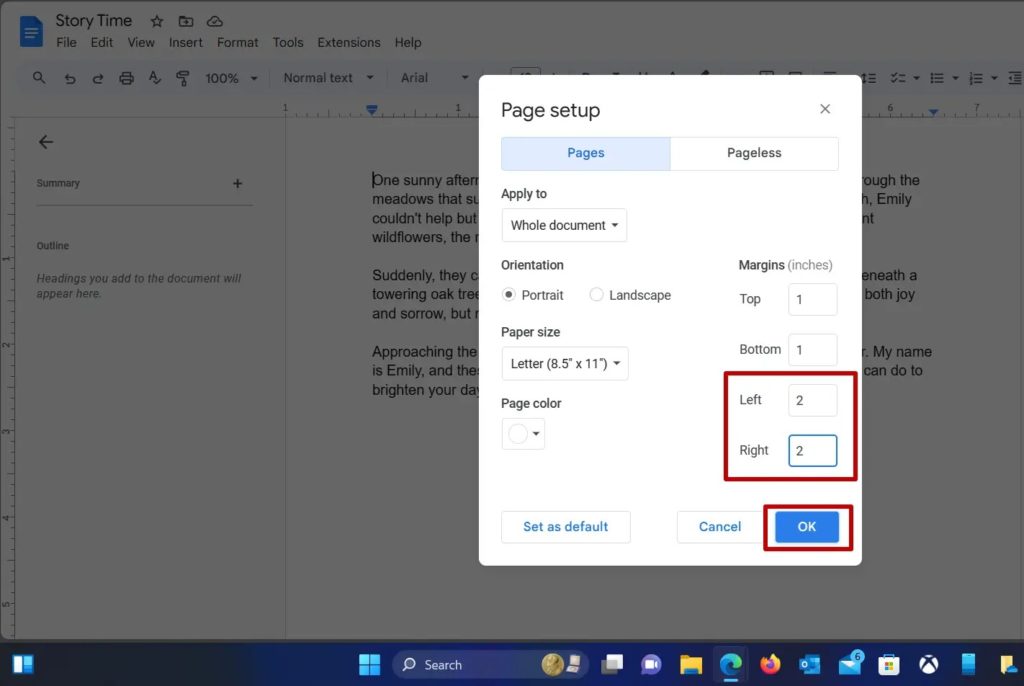
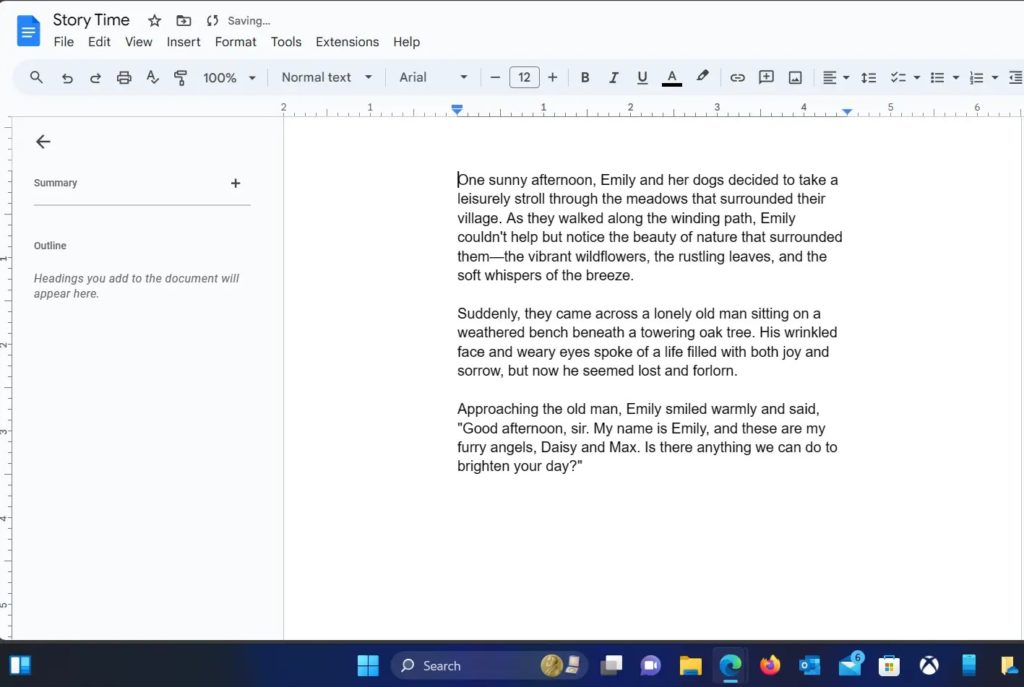
- Input your required margins (in inches) for the Best, Backside, Left, and Proper, and click on on OK. Your customized margins will now be mirrored within the record.

- You’ll additionally set your customized margins as default by means of clicking on Set as default to make certain that long run paperwork adhere on your customized margins.
2. The use of the Ruler
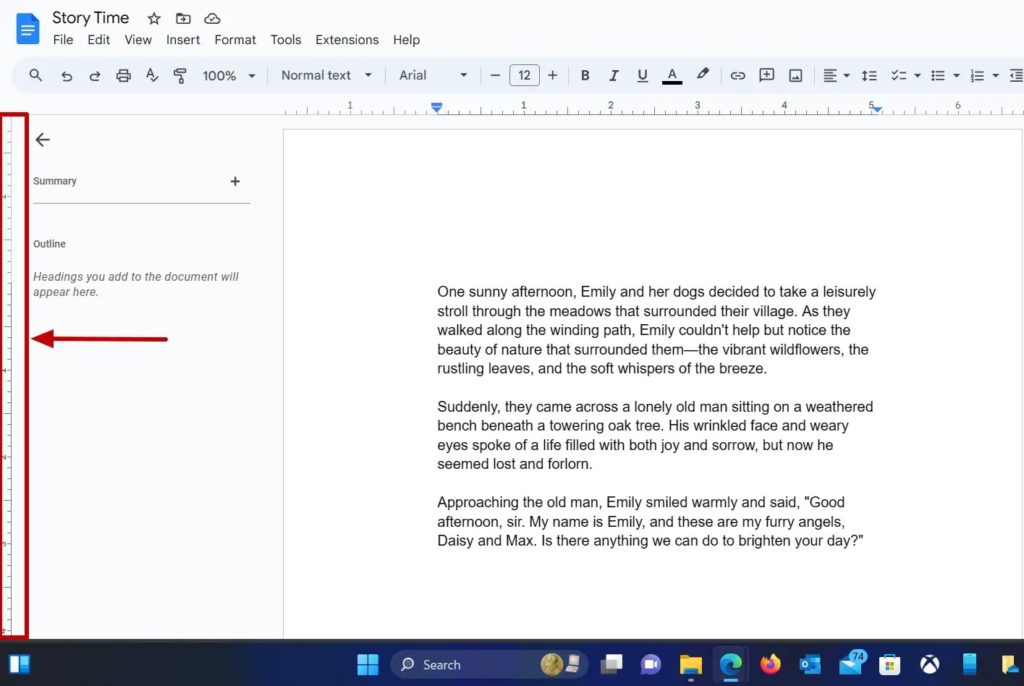
This system is easy, simple to make use of, and works on a trial-and-error foundation. If you wish to practice this system, we propose that the record has a minimum of some content material populated to assist you to modify the ruler and notice the consequences. You wouldn’t be capable to see the result on a clean record.
- Open the Google Doctors report through which you need to modify the margins.
- If the record is clean, upload some random content material to look how it seems that while you modify margins.
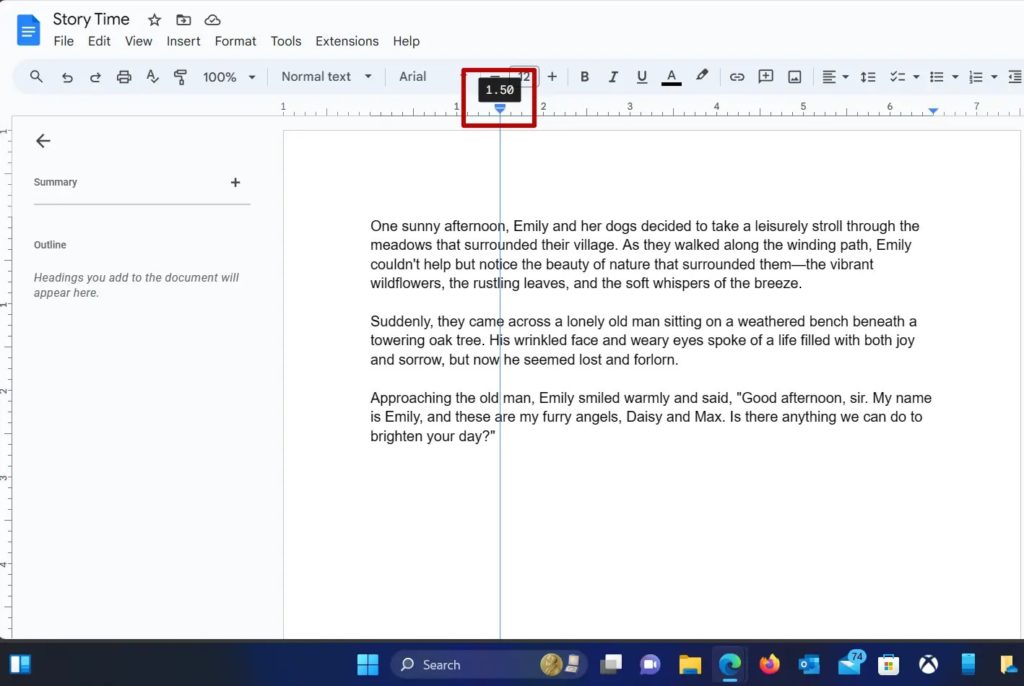
- Now, find the ruler proper underneath the Settings pane with measurements and a small measurement blue colour inverted triangles on all sides.
- Click on at the triangle at the left and slide it against the left or proper in keeping with the necessities. This may increasingly modify the margins at the left facet. Repeat the similar with the triangle at the proper to regulate the margins at the proper facet.
- You’ll additionally modify the highest and backside margins. A black ruler signifies this. Hover your cursor at the ruler and slide up or down to regulate the highest margin. Repeat the similar for the ground margins.
- Voila! Now, you have got set the required margins the use of the ruler in Google Doctors.
You’ll modify the margin even after converting the orientation of the Google Doctors report to panorama mode.
The best way to Alternate Margins in Google Doctors From Android or iPhone
You’ll simply exchange margins on a Google Doctors report out of your Android or iPhone the use of the Web page Setup menu.
- Open the Google Doctors report you need to edit or create a brand new one.
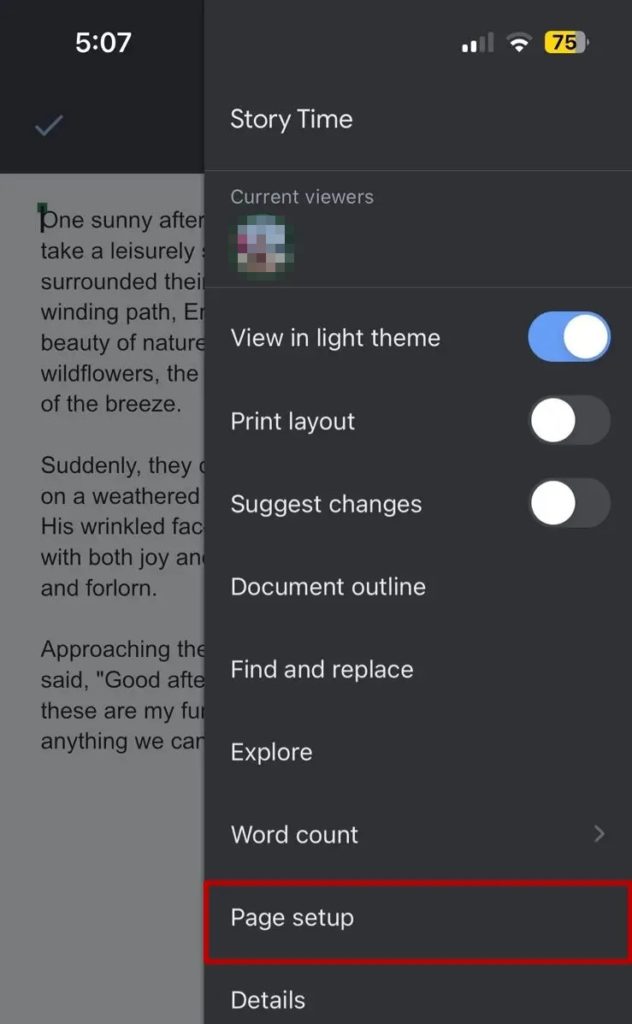
- Faucet on Edit, which is indicated by means of a pencil icon within the backside proper nook of the display screen.

- Faucet the 3 dots within the most sensible proper nook.

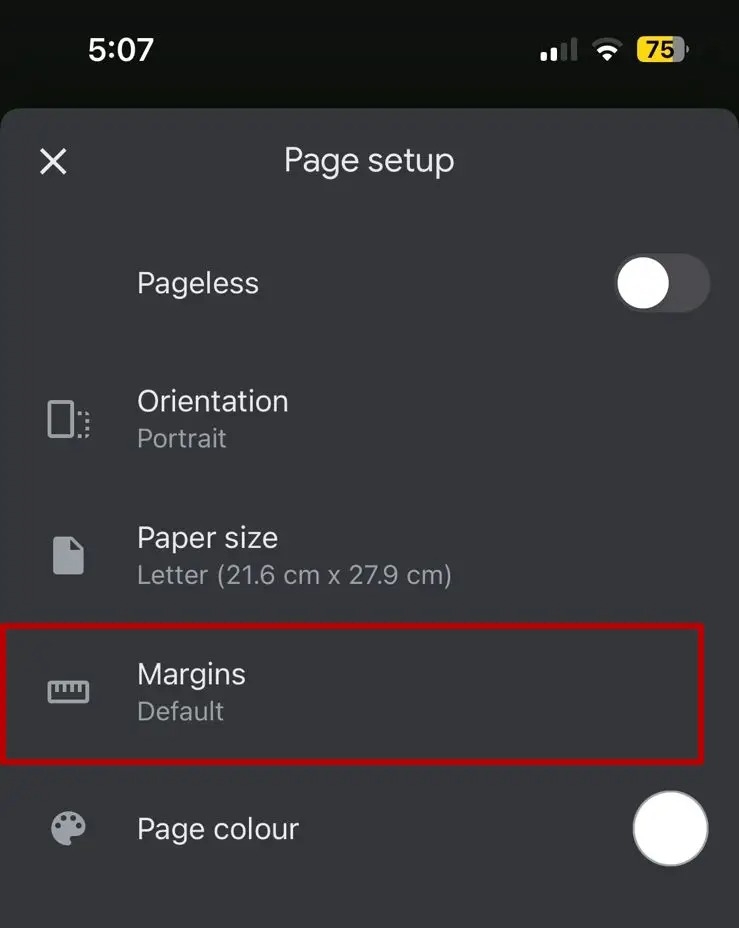
- Faucet at the Web page Setup choice after which on Margins.

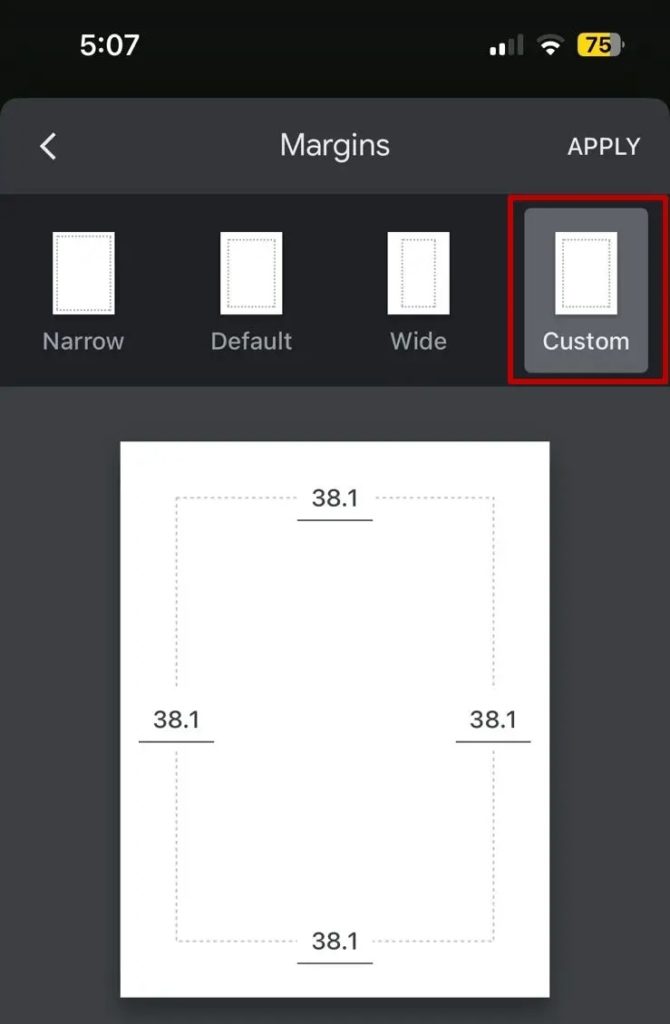
- You are going to be offered with 4 choices: Slim, Default, Broad, and Customized.

- Faucet Customized and input the required margin worth for all of the aspects.
- Faucet Practice for the adjustments to mirror to your present record.
Set The Margins
Google Doctors makes it simple to regulate the margins in a record. By means of tweaking the margin in a Google Doctors report, you’ll be able to tweak its look to make it stand out. Whilst margin changes might appear small to concentrate on, they play an important function in how your record is perceived. We additionally counsel the use of striking indent in Google Doctors, as best tweaking the margins gained’t paintings in some instances.
FAQs
A: Use workarounds like textual content containers or a single-column desk so as to add textual content to margins in Google Doctors. You’ll additionally modify the web page format by means of expanding the margin measurement. Observe that those strategies might not be as exact as desktop publishing device.
A: In case your textual content exceeds the margins in Google Doctors, it might be because of slim margins, textual content formatting, items like photographs or tables now not positioned appropriately, web page breaks, paragraph alignment, multi-column layouts, or printer settings. Adjusting those must clear up the issue.
Allow 48h for review and removal.